Digitizing Old Family Photographs
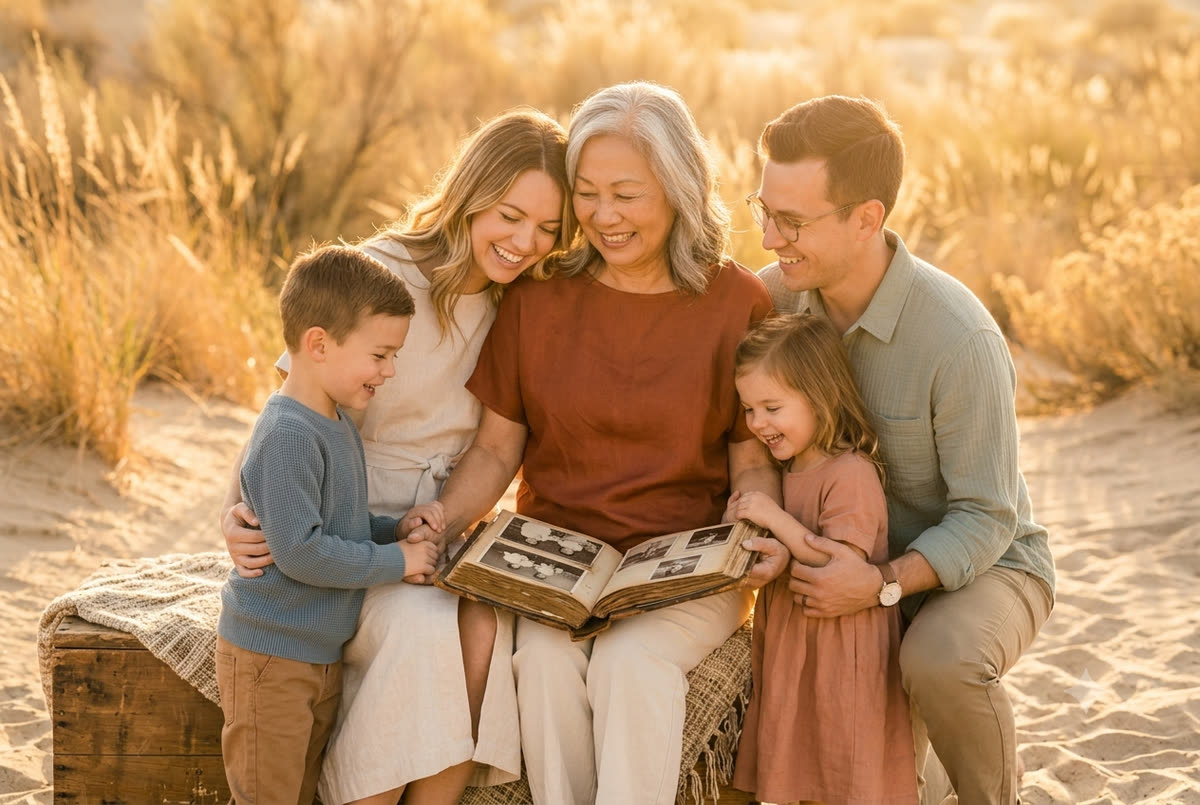
Most families I meet have a box like this somewhere: a shoebox, a fraying album, an old cookie tin packed with photographs that have outlived the people who took them. It usually lives on a closet shelf in Palm Desert or Rancho Mirage, and it usually moves to a new shelf every few years without ever being opened. The pictures inside are quietly changing — colors shifting, edges curling, a little more of the image lost each summer the garage gets hot.
I want to be honest with you about why this matters and what to actually do about it, because "digitize your old photos" is advice everyone gives and almost no one explains. This is the resource I wish I could hand to every client who tells me, half-apologetic, that they have "all these old photos they really should deal with."
Let's deal with them.
Why the desert is harder on your photographs than you think
I work in light for a living, so let me tell you plainly: the two things that destroy photographic prints are heat and humidity swings, and the Coachella Valley delivers both in ways most people don't register.
A photograph stored in a closet that backs onto an exterior wall in Indio or La Quinta can sit through a hundred-plus-degree summer for months. The dyes in color prints from the 1960s, '70s, and '80s are especially fragile — that's why so many of your parents' photos have gone orange or magenta. That color shift is not dirt you can wipe off. It's the image itself fading, and it is permanent and ongoing.
Old prints in a garage, an unconditioned storage unit off Monterey, or a snowbird casita that gets shut up and un-cooled from May to October are aging fast. If your photographs live anywhere that isn't climate-controlled year-round, that's your signal to move them up the priority list. Digitizing doesn't stop the original from fading, but it freezes a copy at today's condition — and today is the best the photo will ever look again.
So the real answer to "when should I digitize these?" is: sooner than you think, starting with whatever is already showing damage.
Start by deciding what you're actually trying to do
Before you scan a single thing, get clear on the goal, because it changes every decision after it. I usually see three:
- Rescue. You have damaged, fading, or one-of-a-kind images and you mainly want a safe copy before they get worse. Speed and safety matter more than perfection.
- Share. You want to get Grandma's photos onto everyone's phones, into a family group, or onto the screen at a reunion or a memorial. Convenience and organization matter most.
- Heirloom. You want archival-quality digital files you can print large, restore, and pass down — the kind of thing that becomes a real legacy piece.
Most families want a blend, and that's fine. But naming the goal keeps you from over-investing in a blurry snapshot or under-investing in the one irreplaceable wedding portrait from 1951. Not every photo deserves the same effort, and pretending otherwise is how people get overwhelmed and quit.
The triage pass — do this first, before any scanning
The single biggest mistake I see is people starting at the top of the box and scanning everything in order. You burn out around photo 60, the box goes back on the shelf, and the important ones never get done.
Instead, do a fast triage pass. Lay everything out on a big table — a dining table works — and sort into rough piles:
- Irreplaceable. Only copy in existence, oldest generations, weddings, military service, immigrant arrival photos, anyone no longer with us. These get scanned first and best.
- Meaningful duplicates. You have five near-identical shots of the same birthday — pick the best one or two.
- Damaged and urgent. Anything actively sticking to album plastic, flaking, water-stained, or badly faded. These can't wait.
- Maybe / later. Landscapes, blurry frames, photos of people no one can identify (though don't toss these — more on that below).
Handle prints by the edges, ideally with clean dry hands or cotton gloves for the oldest ones. Work in a cool room, not the garage. If photos are stuck together or stuck to album pages, stop — don't force them apart. Forcing can tear the emulsion right off the image. Those go to a professional.
This pass alone is worth doing even if you do nothing else that day, because now you know what actually matters.
How to digitize: your real options, honestly compared
There are four ways to get a print into your computer, and they're genuinely different tools for different jobs.
Flatbed scanner
For most family photos, a good flatbed scanner is the right answer. It gives you even lighting, sharp focus corner to corner, and real resolution. If you're buying or borrowing one, an Epson "Perfection" photo flatbed is the workhorse most people land on.
A few settings that actually matter:
- Scan at 600 DPI for standard prints you want to keep and possibly reprint at the same size. Go to 1200 DPI for small prints (wallet size, anything 3x3 or smaller) or anything you might want to enlarge. More DPI than that on a regular print is usually wasted file size.
- Save as TIFF, not JPEG, for your master copies of the important ones. TIFF is lossless — it keeps everything. You can always make JPEGs for sharing later, but you can't add back what a JPEG throws away. For the "later" pile, JPEG is fine.
- Turn off auto color "correction" and dust removal for irreplaceable photos on the first pass — scan a clean, honest copy, then edit a duplicate. Aggressive auto-fixes can soften detail or invent color that was never there.
- Scan several small photos at once on the glass to save time, then crop them apart afterward.
The downside is speed. A flatbed is slow if you have thousands of images.
Phone scanning apps
Your phone is shockingly good now, and for the Share goal it's often enough. Apps like Google's PhotoScan or the scanning mode built into many phones will flatten perspective and cut glare. This is perfect for a quick pass through an album you're borrowing from a relative — sit at a table near a window with soft, indirect light (never harsh direct sun, which blows out the whites), and you can capture a hundred photos in an afternoon.
It will not match a flatbed for the heirloom pieces, but for getting a relative's albums into the family group chat the same weekend you borrow them, it's the right tool.
Photos still in albums or frames
Magnetic "sticky" albums from the '70s and '80s are the worst offenders — the adhesive yellows the photo and can bond to it permanently. If a photo lifts easily, gently remove it to scan flat. If it resists, do not pull. Either scan the whole page on a large flatbed or photograph it with a phone, and leave extraction to someone who does it for a living.
For framed photos under glass, take them out of the frame if you safely can — scanning through glass causes reflections and softness. If the photo is stuck to the glass (it happens with heat and time), that's a professional job; pulling it will destroy the image.
Negatives and slides
If you have the original negatives or boxes of Kodachrome slides, you're in luck — those often hold far more detail and better color than the prints, and they sometimes survived better. But they need a scanner with a transparency unit (light that shines through the film), not a standard flatbed. Carousel slides especially are worth digitizing because the projector bulb's heat damaged them every time they were shown. If you have a lot of slides, this is frequently where a professional service earns its fee.
DIY or hand it off? An honest read
I'm a photographer, not a scanning service, so I have no stake in selling you one. Here's how I actually think about it.
Do it yourself if: you have a manageable number (say, under a few hundred prized images), you find the sorting meditative rather than dreadful, and you have time on your hands — which, honestly, plenty of us find during the quiet, hot summer months when you're indoors with the air running anyway.
Use a professional service if: you have thousands of images, lots of slides or negatives, fragile or damaged originals, or you know yourself well enough to know the box will go back on the shelf. There are mail-in services (you ship a box, they scan and return everything) and local options. If you go local, look in Palm Desert and Palm Springs for photo labs and archival shops, and ask two questions: what resolution and file format do they deliver, and do they ever take the originals off-site? For irreplaceable photos, I prefer services that scan on the premises and let you stay close.
A reasonable hybrid that works for a lot of families: send the bulk, slides, and negatives to a service, and personally hand-scan the dozen photos that would break your heart to lose.
Don't skip this: organizing and naming so you can actually find them later
A folder of 4,000 files named "scan_0001" is not a preserved legacy — it's a digital version of the same unopened box. The organizing is the part everyone underestimates and the part that actually determines whether your grandchildren ever see these.
Keep it simple and sustainable:
- Make one master folder ("Family Photos — Masters") and inside it, folders by decade or by family branch. Don't overthink the taxonomy; "Mom's Side — 1950s" is plenty.
- Rename as you go, lightly. Even "1952 Wedding - Grandma Ruth.tiff" is worth a thousand "IMG_4471." You don't need to caption everything; just enough that a name and a year survive.
- Capture the stories now. This is the urgent part. The photos will outlast the only people who know who's in them. As you sort, call the oldest relative you've got and go through the mystery photos together. Jot names on a notepad or record the phone call. I cannot tell you how many beautiful unidentified faces I've seen in client collections — once that generation is gone, those names are gone too.
Back it up — a scan that exists in only one place isn't safe
The whole point was to stop trusting a single fragile copy. Don't recreate the problem digitally. Follow a simple version of the 3-2-1 rule: three copies, on two kinds of storage, with one off-site.
In practice for a family: keep the files on your computer, on an external hard drive (buy two and keep one at a relative's house or in a safe-deposit box), and in a cloud service (Google Photos, iCloud, Backblaze, or similar). A house fire or a flooded La Quinta garage shouldn't be able to erase your family's history twice. Cloud backup also quietly solves sharing — everyone with the link has the photos.
External drives do die, usually around five to seven years. Set a calendar reminder to check yours and replace them on a schedule.
Repairing and restoring the damaged ones
Once a photo is digitized, the original's decay no longer threatens it — and now you can do things you could never do to the physical print. Faded color can be rebalanced. Tears, water spots, and cracks can be retouched away. A creased portrait of your grandfather can come back looking the way it did the day it was taken.
I'd gently suggest doing restoration on a duplicate of the scan and keeping the untouched master, so you always have the honest original. Light correction you can often do yourself; serious damage — missing pieces of a face, heavy water damage, severe fading — is worth handing to someone experienced, because it's part technical and part judgment about what the photo originally looked like.
This is also the moment families realize the gap in their collection: they have the grandparents and the great-grandchildren, but no recent, beautiful portrait of themselves to hand down. If that thought lands, it might be time to make new heirlooms too — usually right in the comfort of your own living room or at a favorite local park or garden, where everyone is most themselves. That's the subject of my note on planning an extended family portrait session, and on building a family legacy portrait collection worth passing on. If a particular photo is in rough shape, restoring old and damaged family photos goes deeper than I can here.
A realistic plan you'll actually finish
If the whole thing still feels like a mountain, shrink it:
- This week: Do the triage pass. Pull the 20 most irreplaceable photos into one envelope.
- This month: Scan or have those 20 done — properly, as TIFF masters — and back them up in three places.
- This season: Tackle a decade or a family branch at a time, or ship the bulk to a service. Call your oldest relative and put names to faces.
- Ongoing: Replace a drive when it ages out; add new family photos to the same system so it never becomes a box again.
You will not regret the afternoons this takes. I've watched a lot of families gather around a screen and see a parent young again, a wedding nobody had looked at in forty years, a grandfather who passed before the grandkids could meet him. That's the whole reason to bother.
A warm invitation
If you'd like a second set of eyes on a collection — what's worth restoring, what's most urgent, or how to fold these older photographs together with new portraits so your family's story stays whole — I'd genuinely love to help you think it through. I've sat with a lot of these boxes alongside families here in the desert, and there's almost always a clear, unintimidating next step.
You can reach me anytime through my contact page. Tell me a little about what you've got and what you're hoping to save, and I'll point you toward the right first move — even if it turns out to be something you're better off doing yourself.